
Facebook Shop gives cross-border sellers a low-cost way to reach customers through the platform’s large audience. This guide covers the prerequisites, product selection, logistics setup, and every step needed to configure and list products in a Facebook Shop.
Facebook Shop taps into Facebook’s large audience to connect your brand with potential customers, increase exposure, and generate sales. For many cross-border sellers, it can be a valuable source of traffic. This guide starts with what you need before opening a shop and walks you through the setup step by step.
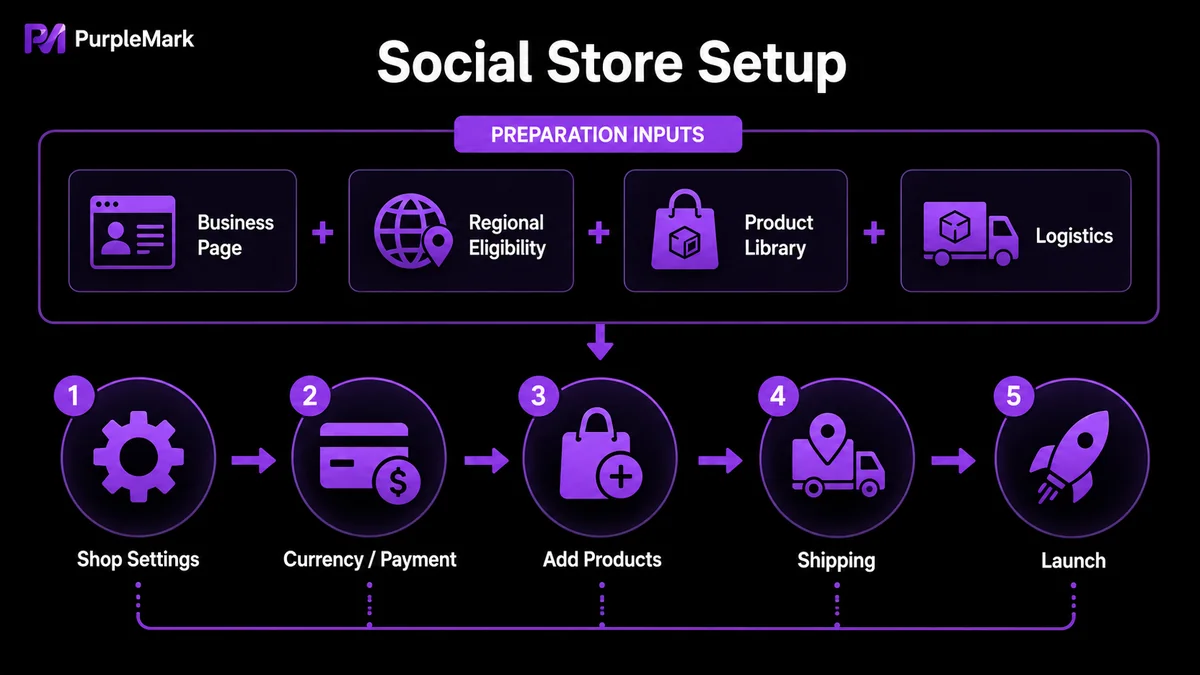
What to Prepare Before Opening a Shop
1. Account and Facebook Page Before applying for a Facebook Shop, you need administrator access to Facebook Business Manager and to your Facebook Page. Use the same business account to manage both your Page and product catalog. In practice, that means creating a business account first and then setting up a branded Facebook Page.
2. Keep Your Network and Business Region Consistent Note that Facebook Shop transaction features are only available in selected countries and regions, including parts of North America, Southeast Asia, and Europe. Mainland China entities are not supported. Apply using a genuine business entity and operation registered in a supported region. If your business is legitimately based in a supported region, keep the network exit location, browser time zone, and language used to manage the shop consistent with your actual business location. This can reduce the chance of extra verification caused by an obvious mismatch between your operating environment and business region. PurpleMark can create isolated environments for different shops and separate shop backends and Cookies, reducing environment mix-ups when managing multiple stores or regions.
3. Build Your Own Product Selection Library Do not blindly follow projects advertised as “guaranteed profit.” Start by building a product pool for your target market. Test clicks, inquiries, and conversions to identify popular products, acceptable price points, and items that convert well, then gradually build your own library of proven products.
4. Work with Reliable Logistics Providers Individual sellers usually need to cover shipping costs themselves. Look for direct logistics providers to avoid inflated prices or poor efficiency. Beginners can test several providers with small orders, stay alert to unreliable operators, and gradually build a dependable logistics network through real-world experience.
Steps to Set Up a Facebook Shop
- Log in to Facebook and open your Facebook Page;
- Click “Shop” in the menu on the left;
- Click “Start Setup” to enter the shop setup page;
- Enter the basic shop information, such as name, category, and address;
- Choose your shop currency and payment method, such as Facebook payment options or PayPal;
- Click “Add Product” and enter the product name, price, description, images, and other details;
- Set product categories and tags so buyers can find items more easily;
- Configure shipping options, including domestic/international shipping and how shipping fees are calculated, then click “Save.”
After setup is complete, a “Shop” entry will appear on your Facebook Page, allowing buyers to browse and purchase your products.
Summary
Facebook Shop is suitable for cross-border sellers who want to build a lower-cost social commerce channel. Treat it as a long-term process of preparation, listing, and operations: first make sure your business entity and Page are compliant, then strengthen the foundations of product selection and logistics, and finally configure the shop step by step. With a genuine business and compliant operations, continuous testing and learning can help turn Facebook Shop traffic into more stable sales.


