
Want a fixed, controllable proxy IP without renting proxies long term? You can build one on your own cloud server. This guide covers the full process, from purchasing a cloud server and enabling a proxy service to binding the proxy to a browser environment, plus key precautions.
When operating across borders or managing multiple accounts, a stable, fixed proxy IP is often important. Instead of renting IPs from a proxy provider long term, some users choose to "build a proxy" on their own cloud server. The benefits are a fixed IP, more control, and potentially lower long-term costs.
This guide explains the full process from buying a server to binding a self-hosted proxy to a browser environment, along with several points to watch out for.
1. Why Build Your Own Proxy
- Fixed IP: The public IP of a cloud server is usually fixed, unlike many rotating proxies;
- Controllable cost: For light usage, a low-spec cloud server may cost less per month than continuously renting proxies;
- Full control: Because you control the server, it is easy to configure ports and change settings.
However, self-hosting a proxy requires some server administration experience. Also, having a dedicated fixed IP means its "reputation" depends on how you use it. If the same IP is used heavily and at high frequency for different activities, its reputation can deteriorate. Evaluate this before proceeding.
2. Step One: Register and Purchase a Cloud Server
Using a common cloud provider such as Alibaba Cloud as an example (Tencent Cloud, AWS, and UCloud follow a similar approach):
- Register an account on the official website and complete identity verification if required;
- Open the console and create an instance under "Elastic Compute Service (ECS)";
- Choose a region (preferably close to the target region you need to access) and select a basic specification that meets your needs;
- Set the login credentials, usually a custom password or key pair;
- Confirm the order and pay, then wait until the instance status becomes "Running".
After purchase, the instance details page will show the connection information you need later: public IP, default username (often root on Linux), password, and SSH port (22 by default).
3. Step Two: Enable a Proxy Service on the Server
A "self-hosted proxy" essentially means running proxy software on the server so other devices can route traffic through its IP. This step requires logging in to the server over SSH. The exact process depends on the proxy software you choose; mature open-source options exist for both HTTP and SOCKS proxies. The general process is:
- Log in to the server via SSH (for example, enter
ssh root@YOUR_PUBLIC_IPin a local terminal and provide the password); - Install and configure proxy server software, setting a listening port and username/password for access to prevent unauthorized use;
- In the cloud provider's security group/firewall, allow the proxy port you configured. Limit access to trusted sources whenever possible to reduce abuse risk;
- Start the service and test from your local machine whether you can access the internet through the proxy.
Commands and configuration vary by proxy software, so follow the official documentation for the solution you choose. For a first setup, test locally first and make sure the proxy works correctly before moving to the next step.
4. Step Three: Bind the Self-Hosted Proxy to a Browser Environment
Once the proxy is running and you have the IP:port:username:password details, you can use it in scenarios that require an isolated network environment. Using a browser environment management platform such as PurpleMark as an example:
- Create a new browser environment and select "Custom Proxy" under proxy settings;
- Enter the server's public IP as the host and your configured port, then enter the authentication username and password;
- Click Check Proxy/Test Connection to confirm connectivity and verify that the outbound IP is correct;
- After the test succeeds, save and open the environment so the account accesses the internet through this fixed IP.
For different business accounts, assigning each account its own environment—and, when necessary, its own server—is clearer and less error-prone than repeatedly switching settings in one environment.
5. Who Is a Self-Hosted Proxy Suitable For?
- Cross-border sellers: Users who want relatively independent outbound access for different stores;
- Social media operations teams: Teams that need stable network environments for different accounts;
- Users who require stable IP addresses and do not want to depend on proxy providers long term.
Summary
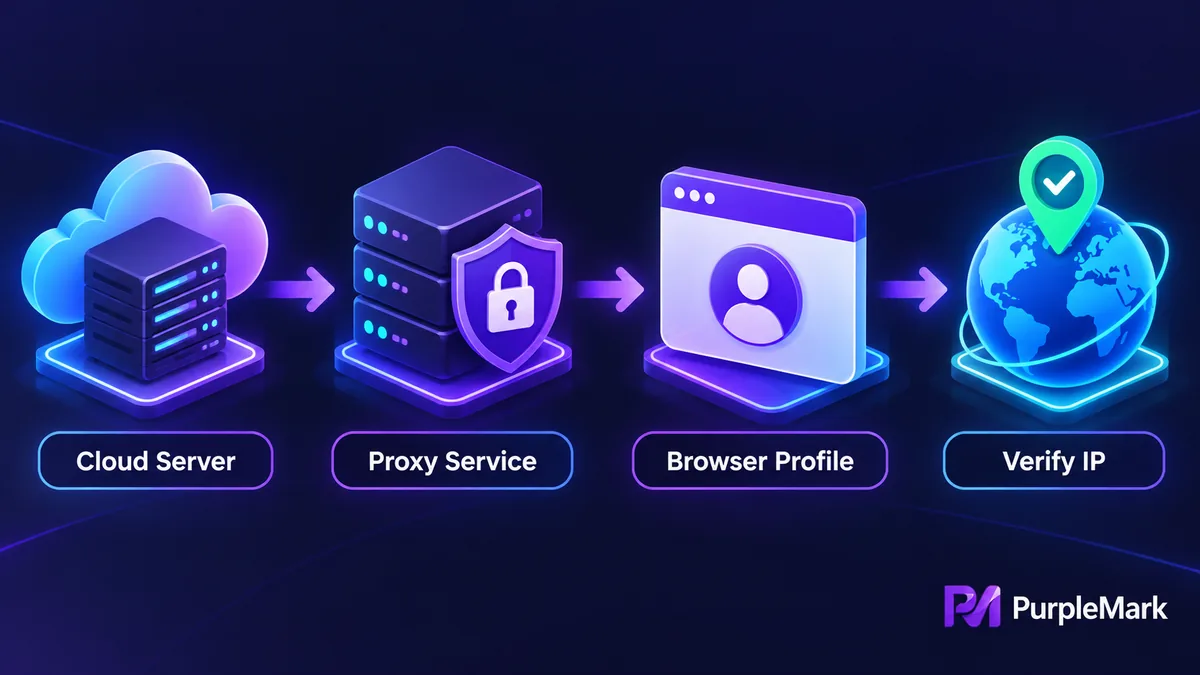
The main value of building a proxy IP on a cloud server is that it can be fixed, controllable, and relatively low-cost. The process is roughly: buy a suitable cloud server → connect via SSH and deploy an authenticated proxy service while allowing the required port → obtain IP:port:username:password → bind it to a browser environment and test connectivity. You need some basic server knowledge, and you should also pay attention to IP reputation and firewall exposure. If those requirements are acceptable, a self-hosted proxy can be a stable option worth considering.


